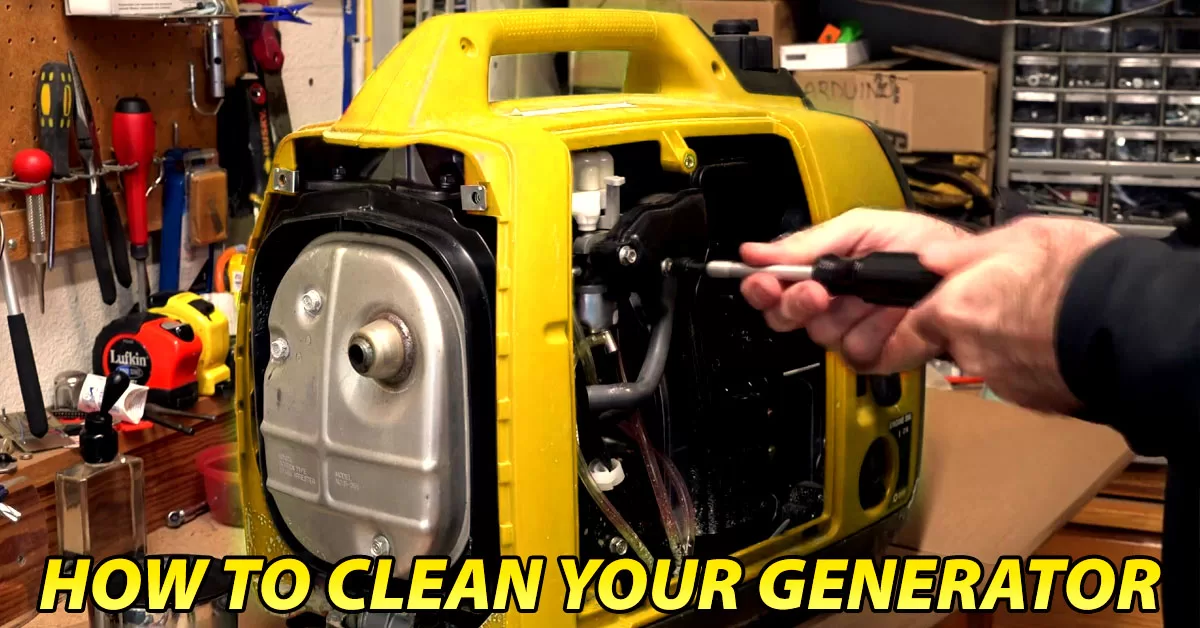
How To Clean Your Generator – 15 Easy Steps
A vital step in maintaining the health and functioning of your generator is cleaning it. A clean generator will operate more efficiently and last longer, but a dirty generator may be more prone to problems and expensive repairs. We’ll explain how to clean your generator so you can keep it in top condition.
Check your generator’s owner’s handbook for any special instructions or warnings before you begin cleaning it. Before doing any repairs, it’s a good idea to turn off the generator and unhook it from any power sources.
What Tools Can I Use To Clean My Generator?
You’ll need a few simple tools to clean your generator. These may consist of:
Brush
To remove dirt and debris from the generator’s exterior, use a soft brush or scrubber.
Rags Or Cloths
You’ll need rags or towels to clean the generator and get rid of any mud or filth.
Screwdriver
To remove the air filter or other parts of the generator, a screwdriver may be needed.
Wrench
Using a wrench to remove bolts or other hardware may be necessary, depending on your generator.
Fuel Stabilizer
It’s a good idea to add a fuel stabilizer to the gasoline tank if you want to store your generator for an extended period to stop the fuel from degrading and clogging the carburetor.
Oil And Oil Filter
You’ll need a fresh supply of oil and an oil filter if you need to replenish the oil in your generator.
New Spark Plug
If your generator’s spark plug is dirty or damaged, you’ll need to swap it out for a new one.
You’ll be equipped to effectively clean and maintain your generator if you have this gear on hand. To ensure your safety, always adhere to the manufacturer’s instructions and take precautions while servicing your generator.
15 Steps For Correctly Maintaining And Cleaning Your Generator
To keep running smoothly and efficiently, your generator has to be cleaned and maintained correctly. The following procedures should be followed to maintain and clean your generator:
Read The Directions In The Manual
It is essential to read the generator cleaning instructions in the manual to make sure you are properly maintaining your generator and according to the manufacturer’s recommendations. The manual provides specific instructions for maintaining and cleaning your particular kind of generator, as well as any dangers or precautions you should take. By following the instructions in the manual, you can make sure that your generator is being cleaned and maintained appropriately. This will lengthen its lifespan and improve the efficiency and smoothness of its operation. Reading the manual will also familiarise you with the different parts of your generator and how they function, which might be useful knowledge to have for troubleshooting any issues that could arise.
Shut Off The Generator By Unplugging It
The generator must be disconnected and switched off to ensure your safety. Make sure the generator is turned off and isolated from any power sources before doing any maintenance or cleaning. You might reduce the possibility of the generator starting up while you are working on it by doing this. By unplugging the generator, you may also help prevent any accidental electrocution that could happen while servicing or cleaning the machinery. Make careful to turn off any fuel sources, such as the fuel valve or fuel pump, to prevent the generator from starting while you are working on it.
Clean The Outside Of The Generator Of Any Dirt And Debris
To get rid of any dirt and debris, you may gently clean the outside of your generator with a soft brush or cloth. Any vents or apertures should be given additional attention since they are prone to become clogged with debris and other things, which might restrict airflow and decrease the generator’s efficiency. To remove any accumulated dirt or grime, you may also clean the generator using a damp towel or cloth. Carefully dry the generator after cleaning it to prevent any water from getting within the electrical parts. Additionally, it’s a good idea to check the outside of the generator for any signs of wear or corrosion, and if required, repair or replace any damaged components. By keeping the outside of your generator clean, you may help maintain its efficiency and extend its lifespan.
Check And Replace The Air Filter
Checking and replacing the air filter is part of cleaning and maintaining your generator. The air filter is essential for eliminating dirt and particles from the air that enters the generator’s engine to maintain maximum engine performance. If the air filter is damaged or clogged, your generator’s performance may decline, and it may even malfunction. Before examining the air filter, locate it (the owner’s manual will specify where it should be placed) and look for any apparent signs of damage or sludge. If the present air filter is dirty, you must purchase a new one. To change the air filter, you may need to use a screwdriver to release any nuts or clips that are holding it in place. Repeat the process to install the new air filter after removing the old one.
Drain The Fuel Tank And Carburetor Bowl
Draining the fuel tank and carburetor bowl is a crucial step in maintaining and cleaning your generator. Over time, the fuel system may get blocked with debris and pollutants, which might cause the generator to malfunction or operate less efficiently. To empty the carburetor bowl and fuel tank, locate the gasoline valve and close it. The nuts holding the carburetor bowl in place may then be removed by using a wrench to loosen them. After the carburetor bowl has been removed, you may use a drain pan or another container to collect any fuel that may still be within. After that, you may use a hose or funnel to empty the gas tank. Make sure to get rid of any gasoline you drain properly, possibly by taking it to a recycling center. Clean the surfaces with a cloth or rag to remove any dirt or debris after emptying the gas tank and carburetor bowl. The gasoline valve may then be switched back on when the carburetor bowl has been replaced. Emptying the fuel tank and carburetor bowl of any debris or pollutants that may have accumulated in the fuel system can keep your generator running smoothly.
After Cleaning The Spark Plug, If Necessary, Replace it
After cleaning, the spark plug may need to be replaced if it is severely worn or damaged. Since the spark plug is an essential component of the ignition system, it may have a detrimental effect on how well the generator runs if it is unclean or damaged. Removed with a spark plug socket or wrench before being replaced. Once the old spark plug has been taken out, the new one may be put in by threading it into the spark plug hole and tightening it using a spark plug socket or wrench. Follow the manufacturer’s instructions closely while replacing the spark plug to ensure proper installation. Use a spark plug socket or wrench designed especially for your generator to avoid damaging the spark plug or the spark plug hole. By replacing the spark plug as needed, you can keep your generator running smoothly and help ensure that the ignition system is functioning properly.
Examine The Oil Level And Add More If Necessary
Checking the oil level and adding more oil as necessary are steps in cleaning and maintaining your generator. Since it helps lubricate the engine and prevent wear and damage, it is essential to keep the oil level at the recommended level. To check the oil level, locate the oil dipstick and remove it from the engine (the location of the oil dipstick is specified in the owner’s manual). After cleaning, reinstall the dipstick in the engine. Examine the dipstick indicators after removing them once again to find the oil level. If the level is low, more oil will have to be added. To add oil, locate the oil fill cap and take it off. A funnel may then be used to pour the oil into the engine. Use the proper oil for your generator and avoid overfilling the engine. Once the oil has been added, replace the oil fill cap and confirm that the oil level is correct by checking it again. By keeping the oil level at the recommended level, you can help ensure that your generator’s engine is properly lubricated and increase its lifespan.
Check The Fuel Lines And Filter
Checking the fuel lines and filter is part of cleaning and maintaining your generator. Over time, dirt and debris may build up in the fuel lines and filter, which can affect the generator’s efficiency or even lead to a breakdown. Find the fuel lines and filters, and inspect them for any apparent signs of damage or sludge. The fuel lines and filter need to be cleaned or replaced if they are dirty or damaged. The fuel lines may be cleaned by wiping them down with a cloth or rag. If the fuel lines or filter are being held in place by bolts or clips, you may need to use a screwdriver or other tool to remove them to replace them. By redoing the removal of the previous gasoline lines or filter, the new ones may be fitted. If the fuel lines and filter are maintained spotless and in outstanding shape, your generator will run more efficiently and smoothly.
Investigate The Cooling System
The cooling system helps regulate engine temperature and guard against overheating. Before you investigate the cooling system, find the coolant reservoir and check the coolant level. If the level is low, more coolant will need to be added. Coolant may be added by funneling it into the coolant reservoir. Consult the owner’s manual to choose the right kind of coolant for your generator, and don’t overfill the reservoir. Additionally, look for any signs of wear or corrosion throughout the coolant lines and radiator, and fix any damaged parts as needed. By keeping the cooling system in top working order, you can help prevent the generator’s engine from overheating and ensure that it is performing smoothly and efficiently.
Check the battery
The battery drives the generator’s electrical system, therefore keeping the battery fully charged and in good shape is essential. Before examining the battery, locate it and look for any apparent signs of wear or damage (the owner’s manual will specify its precise location). If the battery is rusted or outdated, it may need to be replaced. To remove and replace the battery, the nuts keeping it in place must be removed using a tool. After removing the old battery, you may replace it by turning around. Follow the manufacturer’s directions closely while replacing the battery to ensure proper installation. It’s a good idea to run the generator for a few hours once a month even if you aren’t using it to keep the battery charged. By keeping the batteries in good condition, you can help make sure that your generator’s electrical system is functioning properly and that it is running smoothly.
Check The Belts And Hoses
It’s crucial to keep the belts and hoses in top shape. Find the belts and hoses and inspect them for any apparent signs of wear or corrosion. If the hoses or belts get damaged or worn out, you must replace them. Removing the clamps or nuts and keeping the belts or hoses in place, you may need to use a tool to remove them. After removing the old belts or hoses, you may replace them by going backward. To ensure proper installation while replacing the belts or hoses, be cautious to follow the manufacturer’s instructions. Maintaining great conditions for the belts and hoses can improve the efficiency and smoothness of your generator’s operation.
Examine The Exhaust System’s Interior
Maintaining proper exhaust system performance is essential. Before beginning to examine the inside of the exhaust system, locate the exhaust pipe and check for any apparent signs of clogs or damage. If the exhaust pipe is clogged or damaged, it has to be cleaned or repaired. To remove any dirt or debris that could be clogging the exhaust pipe, you might use a brush or cloth. To repair it, you may need to remove and replace the exhaust pipe using a pipe wrench. Making ensuring your generator is running efficiently and smoothly may be achieved by maintaining the inside of the exhaust system.
Investigate The Electrical System
It is crucial to keep it in excellent operating condition. Before starting to examine the electrical system, find the electrical connections, and inspect them for any evident signs of wear or damage. If you discover any issues, the electrical connections may need to be fixed or replaced. To repair the electrical connections, you may need to take any damaged wires out and splice in new ones using a wire remover. If you wish to change the electrical connections, you may need to use a screwdriver or wrench to take out the old ones and install the new ones. Follow the manufacturer’s recommendations for repairing or changing the electrical connections to ensure proper installation. By servicing the electrical system, you can help ensure that your generator is running smoothly and efficiently.
Keeping The Generator Safely Stored
It’s essential to follow a few simple guidelines to store your generator correctly. Carefully disconnect the generator from all power sources before turning it off. To prevent the gasoline from deteriorating and clogging the carburetor, the fuel stabilizer may then be put into the fuel tank. If you want to keep the generator in storage for an extended period, this is essential. Next, you should store the generator in a dry, well-ventilated area to prevent corrosion and other damage. If the generator is kept in an area that is susceptible to flooding or other natural disasters, it might be damaged and become unsafe to use. The generator should be kept dry and clean by using a protective cover.
Follow The Maintenance Regimen Advised By The Manufacturer
It’s essential to follow the manufacturer’s recommended maintenance plan for your generator to run efficiently. The manufacturer of your generator will provide thorough maintenance guidance, including how often to do tasks like changing the oil or inspecting the air filter. Following the manufacturer’s suggested maintenance plan will help ensure that your generator is well cared for and performing at its best. Following the maintenance plan may also extend the life of your generator and reduce the need for costly repairs or breakdowns.
By following these recommendations, you may keep your generator running efficiently and effectively for many years. Always follow the manufacturer’s instructions and use caution while maintaining your generator to ensure your safety.
Tips For Clean Your Generator
Here are a few prompt generator cleaning recommendations:
- Never clean or maintain the generator before turning it off and unplugging it.
- With a soft brush or cloth, softly scrub the generator’s exterior.
- Check and replace the air filter as needed.
- Drain the gasoline tank and carburetor bowl to rid the region of any pollutants or dirt.
- Replace the spark plug if it is severely worn or damaged.
- Verify the oil level, and add more if necessary.
- Fuel lines and the gasoline filter may need to be cleaned or replaced.
- Examine the cooling system, and if required, fix any damaged parts or add more coolant.
- Check the battery and replace it if it’s old or damaged.
- Replace the belts and hoses if they are worn out or damaged.
- Examine the exhaust system’s inside, then clean or repair it as required.
- Check the electrical system, and if required, repair or replace any damaged parts.
- to guarantee that your generator is kept up to date by the manufacturer’s maintenance recommendations.
Conclusion
Maintaining and ensuring the effective operation of your generator requires cleaning. By taking the necessary measures and performing regular maintenance procedures, you can help keep your generator clean and in great working condition. By following the suggestions, you can make sure that your generator is in excellent operating condition and will be available when you need it.
FAQs
How Often Should I Clean My generator?
It’s recommended to clean your generator at least once a year, or more often if you use it frequently or keep it in an unclean or dusty environment. You should also do normal maintenance tasks like checking the oil level and replacing the air filter, as instructed by the manufacturer.
Can I Clean My Generator With A Pressure Washer?
In general, using a pressure washer to clean your generator is not recommended since the high-pressure water might cause leaks or harm electrical components. Instead, you may use a soft brush or cloth to gently scrub the generator’s exterior before wiping it off with a wet towel.
Can I Use Any Kind Of Oil To Lubricate The Generator’s Engine?
No, it’s essential to use the specific brand of oil that the generator’s manufacturer has recommended. The use of improper oil might compromise the generator’s performance. Consult the owner’s manual for information on the particular kind of oil you should use.
What Should I Do With My Generator Once I Remove The Oil And Fuel?
You should properly dispose of any oil or gasoline that you drain from your generator, such as by taking it to a recycling center. It should not be flushed or dumped into the ground since it might harm the ecosystem.
Can I Do All Of The Maintenance On My Generator By Myself?
Checking the oil level and cleaning the air filter are just two of the generator maintenance tasks that homeowners may do. However, certain professions could need particular knowledge or tools.
Can I Use Any Sort Of Cleaning Product To Clean My Generator?
In general, you should avoid using any abrasive cleaning or chemicals on your generator since they might damage the finish or electrical components. Instead, you should use a mild detergent or soap solution together with a soft brush or cloth to carefully clean the generator. Carefully rinse and dry the generator after cleaning it.
How Do I Check And Maintain The Carburetor On The Generator?
Carburetors often have a “gumming-up” issue. Using a combination of contemporary ethanol and outdated gasoline might cause a buildup of a substance that resembles sludge in the carburetor (based on maize). Click this link for straightforward directions on how to clean your carburetor.

